

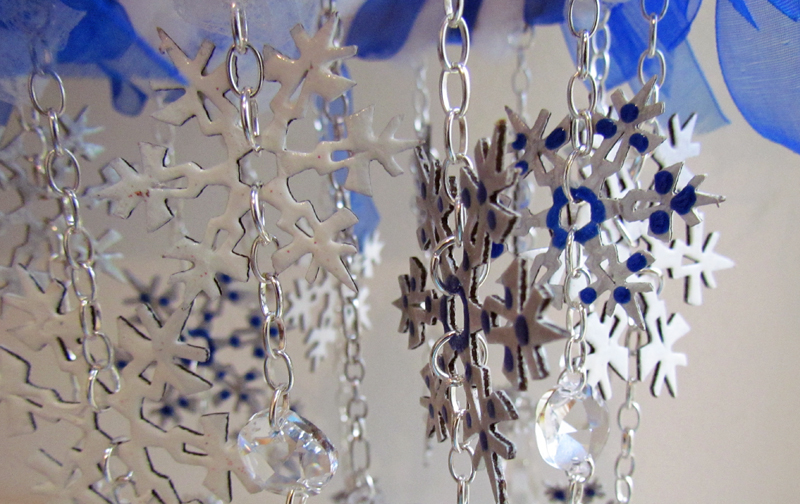
I am in love with the Globecraft 3D Enamel Gels! They elevate even ordinary projects to a level of jewelry. In this case, I used them to create a winter mobile.

 | |||||
| Laura Drahozal Rememberinglifesmoments |
Globecraft Memories Snowman Ornament
Globecraft Piccolo Snowflake Accents (enough for 6 pieces of each size)
Globecraft Memories Metallic Silver 3D Enamel Gel
Globecraft Memories 3D Enamel Gel in Titanium White
Globecraft Memories 3D Enamel Gel in Ultramarine
Globecraft Memories 3D Enamel Gel in Napthol Red
Globecraft Memories 3D Enamel Gel in Burnt Umber
Globecraft Memories 3D Enamel Gel in Orange
Globecraft Memories Glastique
Ranger Adirondack Snow Cap White Paint Dabber
Stickles in Gunmetal
Ranger Inkssentials Nonstick Craft Sheet
Tim Holtz Sizzix Alterations Texture Fades Damask & Regal Flourishes Set
Manual Die Cut Machine (I use the Cuttlebug)
Stampendous Fun Flock in Hazy Grey
Stampendous Fun Flock in Cotton Ball White
About 1 Meter of Jewelry Chain
Jump Rings in Assorted Sizes
One Large Circular Finding (to hang mobile)
16 Gauge Wire
20 Gauge Wire
Jewelry Pliers
Small Wooden Embroidery Hoop
White Tulle Ribbon
Blue Organdy Ribbon
We R Memory Keepers Big Bite
Scissors
3 Binder Clips
7 Crystal 1.5" Teardrops
6 14mm Crystal Circles
DIRECTIONS:
1) Place Piccolo pieces on craft sheet and paint one side with dabber. Let dry.

2) Flip Piccolo pieces and paint the other side. Let dry.
3) Repeat steps one and two.
4) Use orange, red and brown colored enamels to paint in details on snowman. Let dry.

5) Use silver enamel on on half of each size of the snowflakes. When dry, do the back.
6) Use white enamel on the other half of each size of snowflakes. When dry, do the back.
7) Use white enamel on the body and snow under the snowman. Let dry.
8) Use the texture plate and the die cut machine to add texture to both of the ornament frames.
9) Add color to the ornament frames by putting blue enamel on the frame and smearing with your finger.

10) Add blue enamel accents on one side of the silver snowflakes. This way, depending on the direction that the snowflakes are hanging, they will either be silver or silver and blue.
11) When everything is dry, use Glastique and flock colors to add fuzzy detail to the snowman hat. Let dry.

12) Add eyes and buttons to snowman using the Gunmetal Stickles.
13) Glue smallest snowflakes to the ornament dome by using just a dot of Glastique on the outside of the snowflake and placing it into the dome. Be careful where you place them, so that the snowman will still be visible. Let dry.

14) To create the ornament, use a bead of Glastique around the inner frame. Add the dome. Make another bead of Glastique if necessary and add outer frame. Be careful to hold it together as you flip the ornament and do the same to the back. Clip with binder clips until dry.

15) Use the 16 gauge wire to create a line across the center of the inner embroidery hoop. Wrap around the edges a couple of times on each side.

16) Evenly divide the space inside the hoop and add two more wires to create 6 even sections.

17) Wrap a little of the 20 gauge wire around the point where all the wires meet.
18) Attach a large jump ring over the center section and add chain to each side.
19) Attach the large round finding on one of the chains. This is what you will hang the mobile from.
20) Attach the ornament to the other end of the chain.

21) Use the chain and jump rings to make 6 units that are arranged like this: a little chain, the largest snowflake, a slightly longer chain. The chains should not be the same lengths.
22) Hang each of these from one of the "spokes" you created in step 16. Hang the smaller chains from the hoop.
23) Create 6 units that are arranged like this: a short chain, the medium large snowflake, a little chain, the round crystal, a slightly smaller chain, the medium snowflake.
24) Hang these units using the 20 gauge wire from the hoop in between the other snowflakes.
25) Hang the teardrops from the largest snowflake chains like this: cut 20 gauge wire, pass through the teardrop, bring up both ends and twist twice. Pass tails through the bottom link of the chain and twist. Put second smallest snowflake over one of the tails and twist tips together.
26) Use Big Bite to punch a small hole at the bottom of the ornament.
27) Hang final teardrop from bottom of the ornament.
28) Wrap hoop with tulle ribbon and wrap end up into center around opposite spokes. Tie in bow on center chain.
29) Cut 6 5" or so pieces of blue ribbon. Tie ends together.
30) Wrap blue ribbon around tulle ribbon, putting ties near each spoke. Tie last two ends together.
31) Create bows from remaining blue ribbon and tie into place at each spoke.


5 comments:
This is an eye candy blow out-it's stunning.
Beautiful, Laura! I bet it really glistens in the sunlight!
Such a beautiful choice in colors! The crystals and snowflakes go wonderful together. :)
This is ADORABLE! I love it!
Great minds think alike.. I am working on a wind chime right now. I love this and you did a great job! I love the snowflakes!
Post a Comment